
First the excess fibre that was deliberately made had to be trimmed off.
 All the area had to be roughened so that epoxy binds the wood to the boat strongly.
 Next the 3" by 1" hardwood had to be cut to size. The rudder hinges attaches through the transom and into these wood so that the pressure from the weight of the rudders are distributed over a wider area. The corners of the hard wood had to be rounded so that when a layer of cloth is applied over it less air bubbles are formed.
 It is hard work but I enjoy the torture! When building my catamaran my thought are almost always my thousand kilometers from where I am.
 Since the knee which is made from 9mm marine ply has some odd angles I had to use a cardboard to make a template so that it fits well.
 After all the wood had been cut to size they are glued on to the transom using epoxy. Clamps are used to hold the wood in position and to give a better bond by applying pressure to the wood.
 Done..all it needs now is a layer of 600/225 gm biaxial cloth.


 Most of the
  We were in for a
  This was the bed for one of the boys. Some of the students were just sleeping on the cement floor.
 There was no water supply nearby so it had to be brought up in
  For their only meal of the day there was nothing much to be eaten. What I saw was only rice and some leaves.
 BUT these boys were cheerful and looks happy. To them they are waiting for a bright future after their university education.
 I had a look at their mathematics module. It looks like Form 2 work to me but these are for their university here. No wonder one of my engineering hand who had been teaching in a university do not even know the working of an internal combustion engine! He graduated as an industrial engineer from Indonesia.
 Our house is located at the bank of the Chukai River in Kemaman. It is the local laws that there must be a buffer before the river and any house. This buffer belongs to the government. Since my house is the last house before the river, I had the previlege of using this land to grow some fruits and vegetables fo our own consumption. It had been designed so that our house is about 3 ft higher than the plot so that from the house compound we cannot see the vegetable plot
 I had several bunds of Kai Lan, Lettuce and Spinach ( sawi). I do not need to buy greens from the market for about 8 months every year. Those bright looking vegetables sold in the market are full of chemicals . Greens from my garden esp the letuce are normally eaten raw or just stir fried. Home grown greens do not have a bitter taste.
 I make my own compost to be used as plant food from the grass cutting of my garden
 We have several lime and lemon trees to provide us with all the sour contents of our cooking
 Bananas trees that we grow are the gigi gajah variety which is almost extinct now. It looks something like the pisang montel and is very tasty.
 These star fruits are the honey variety but I have to compete with the squirrels to get the fruits. My Alsation dogs will scare the monkeys away but they don't seem to mind the univited squirrel guest!
 Five dragon fruit trees provide us with fresh juicy fruits that are full of anti oxidants
 The dragon fruit flowers are real nice.
 However when taking the fruits one got to be careful. My wife just got ""stung" by the tree! Ouch!!
 I have also discovered that by allowing the weeds to grow in between the veggies I can actually have worm free veggies. The worm maybe like the weed more than the veggies.I got to report this new discovery to the University Pertanian!
 Over several evenings we cut the bulkheads and used cheap ceiling wood for making a basic frame. I got some old lorry canvas to be used as the skin of the kayak. Before long the kayak was ready. It was a very stable boat and I had a lot of fun with it.
 With the help of the three workers and another 3 friends I decided to get the hull rolled over. First I had to start removing the supports for the bulkheads.
 Removing the last few pieces of wood can be quite
  I briefed the workers and positioned three men on each side. I was to be the cheer leader from the front. Emergency procedures were briefed to the workers. You can get hurt if you
  I got them to lift the boat off the ground initially just to see how light it was.
  Now..on my command roll the hull to my right. Steady...
 These two big planks that support the hull will be put to good use in some parts of the boat later. It is strong and mature wood.
 Get ready...lift..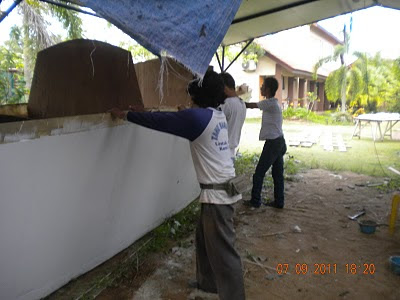
 With the approaching monsoon in a few week's time there is not much that I can do on the boat except for the smaller bits and pieces. Now just one more problem. I
