Saturday, September 8, 2012

Helping Hands........

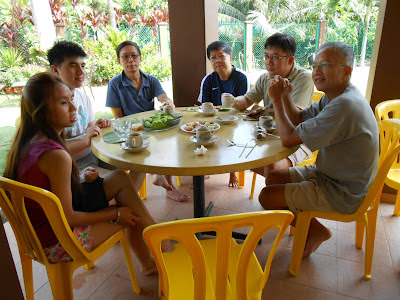
 I had a group of friends that came up over the weekend. We went trekking up Gunong Berembun. After the end of the trek we met up in my house and had a mini party. At the back of my mind I was thinking I should take this opportunity to roll the hulls of my catamaran to it's side so that I could apply more layers of glass to the bow of the hulls.This problem has been tickling me for a while.I tried to squeeze myself in but I cannot work. Tried looking for some smaller persons but they don't know what to do.The best alternative is to lay the hull on it's side and crawl in to work. This was recommended by some earlier builders and in fact it is also written in the plans.


After a good breakfast I took them to my boat shed and briefed them what needs to be done.
The idea is to roll the hull on it's side at the rate of 30 degrees per movement. I was the cheer leader and was giving the command for the movements. Actually the hulls are light but the more people I have the merrier! This picture is the first  tilt.
Now the second tilt..another 30 degrees.
And the final tilt. Easy does it.
Mirror mirror on the wall.....who has the fairest bum of them all...

Next I have to reposition the two completed beams to my garage to make space for me to work on the boat. This is where friend come in handy too...
  The beams are now safely secured in my garage and will be brought out for the final assembly of the catamaran.

Monday, September 3, 2012

Trimming the Hulls

The flat panels that were made were slightly bigger than what is required. After the hulls were completed the panels had to be trimmed. To trim the hulls a diamond cutter had to be used. In the earlier days I tried to use the jigsaw and it was a complete disaster. Every meter or so I had to change the blade.

I even had a student doing boat building in the university on vacation coming over. As usual he does not know anything outside the books so every little thing I have to teach and demo to him before he can do.No problem on that...it is part of my contribution to society!
 The trimmed hulls looks very smart!


Next, the bulkheads had to be reenforced with wood.  This is to allow stringers to be placed on top of them and later the hull top is built. we can then jump and run over it.
 
I always run out of clamps . In boat building no matter how many clamps you own, you are always a few short!


Saturday, August 25, 2012

Climbing Gunong Berembun and Cemerong

I had two days off from flying and  decided to go for a hiking trip in the mountains of Ulu Dungun. These two hills, Gunong Cemerong and Gunong Berembun are located in Pasir Raja area, a place I love to haunt for it's natural beauty.. It is also because I need to familarise myself with the trail as my friend Martin Lee and his gang and some of my gang will be coming over to the East Coast to climb these two mountains.
I had lured two good old Hashers from my hash chapter to come along with me.  Mr Rothman King Size and Mr Pretty Boy had taken the bait and I picked them up at 0600 hrs on Tuesday 21 Aug 2012 for the journey to Cemerong Waterfalls where the trail starts and ends.
We started the hike on high spirits. Both Pretty Boy and Rothmans are very fit hashers (stronger than me for sure!). They had been in the timber industry too so they are very well versed in the art of jungle craft.

All along the trail there are a amazing species of flora and fauna to feast our eyes.

The trail is very well maintained and is extremely clean too. But beware... it starts off with a very steep climb. Do not be mislead by the information on the track distances because the distance indicated is only the horizontal distance and NOT the actual the surface distance. Hence the first check point KEM B is only 2200 meteres but believe me it takes a pretty long time to get there. Along the trail the distance to Gunong Berembun are marked every 250 meters.

This is Kem B. located only 2200 meters from the starting point. It took us about 2 hrs to reach here.
We were rewarded with a very beautiful river. The water here is crystal clear and it tastes very good.

After Kem B, the trail is more bearible.. not so steep. We had inadvently gone to the Gunong Cemerong trail but it does not matter as this trail is a loop and we will eventually get to both the peaks


The trail is well marked with signs like this
After Gunong Cemerong we crossed some steams and decended down again. From here I got a glimpse of Gunong Berembun

Gunong Berembun is 1108 meters above sea level.


After crossing a few more streams we arrived at Langsir Waterfall. The view from here is majestic

There are prepared campsites at Langsir waterfall and if the trail is to be joyed at a leisure pace this is the place to camp.

From the edge of  the waterfall we can see tha cascading falls .


This is the peak of Gunong Berumbun

For lunch we cooked instant mee with tuna and the meal ended with mushroom soup.


My recommendations for would be climbers...

Come prepared physically to enjoy the hike
Bring sufficient food and drinks otherwise the stream water is very good too
Share a small camping stove for every few climbers.Hot food is good for your morale!
Shoes are very important. Wear proper shoes.
Carry a GOOD MORNING towel to wipe your sweat.
Bring along your hand phone. There is good reception all along the way
Walk light. Carry only essential items otherwise you will be carrying dead weight

Overall this is a very good trail. I will be going back for another trip soon.
Saturday, July 21, 2012

Rebuilding the Second Beam

The 2 by 3 timber that I used to build the second beam were curved and I was not aware of the "proper" way to uncurve the wood.Instead of opposing the curves of the wood I followed the curvature of the timber. The problem comes when I had to place the next two pieces of 2 by 3 timber on top. It was an almost impossible task so I had to consult my good friend Ah Ying who is a master carpenter.


His solution was simple..Tear off the 9 mm  ply on both sides. After tearing off the 9 mm ply I prepared the surface by grinding off the epoxy and planning the 2 by 3 timber again...no not to plane it straight but to plane it so that there is no more epoxy.

Meanwhile I was cutting the stainless 3/8 inch bolts to the correct size. It came in a long rod 7 ft long and I only require 7 inches per bolt.


Ah Ying came today and he helped me to rebuild the beam. I should  have done it this way from the start. Build one "box" first and then join together the second box.Here the first "box" is completed and we were in the process of joining the second box


The trick is to use 1 inch stainless steel nails to "force" straighten the old piece of structure

. .
After that it was drilling holes about 30 inches apart to put in the stainless steel bolts and nuts. This combined with the epoxy will make a super strong beam.


Now both the beams are ready...well almost as some trimming will be required later

Monday, July 9, 2012

Building the Main Beams for my Gypsy catamaran

A catamaran has two identical hulls which are built separately. When the hulls are completed they have to be joined together. To do this two main beams have to be built. The plan calls for using "best quality hardwood" 2 inch by 3 inch to be used. For this special hardwood I was recommended a tropical hardwood BALAU HITAM . This species was recommended to me by a hasher friend and he had been kind enough to select a  matured  tree to saw the timber for me.

The wood is then planned so that the boding with epoxy is better. This is tough work with a hand planner.


The 2 by 3 are laminated with 9 mm ply on the outside and 6 mm ply on the inside.The width of the marine ply is 220 mm. There must be sufficient clamps to get the job done and in boat building there is never sufficient clamps!
Since I do not have sufficient clamps I build the beam in sections of 8 ft. The plywood are joined with a 200 mm ply.
I was hoping that I could save some time by building both the beams together.The first beam on the left came out as predicted with no surprises.

The plan calls for 4 inch screws to be screwed in place at 100 mm apart. I did not like the idea and I propose to use a stainless steel bolt to be bolted through the 2 by 3 s at lesser intervals. This was accepted by the designer Richard Woods.
Now, there is a "little" problem with the second beam on the right. Because of some warping in the timber it became almost impossible to place the other 2 by 3 timber on top.without tearing the plywood. Now, rebuilding the second beam will be another interesting story.


Tuesday, July 3, 2012

My hulls are perfect!


Normally the hulls are covered with cheap canvas that I purchase from the hardware shop. However about 4 ft of both the hulls protrudes outside my canvas shed. This year has has been an exceptionally wet year and when there is a heavy rain with strong wind water leaks into the forward two compartments.

On a bad day water may even flow to the other compartments. I use this to check if my hulls are completely waterproof without any leaks. Both the hulls passed with flying colours!

Then comes the back breaking task of bailing out the water. Too little to set up a pump and too many squats and back bending to scoop out the water!

And when it is almost dry I will have to use a sponge to take the last drops away. The last few drops I usually leave it to the sun to dry it out. If I had left the hulls uncovered when I go flying and it rains, I will have to repeat the  exercise again! Thank god the dry weather period is here again!

Saturday, June 23, 2012

Becoming a Swiftlet Rancher

 My friend had been telling me that this business should be a viable one for retirement. ....Swiftlet Ranching. The crazy Chinese love to take the Bird;s nest as a health supplement. It was supposed to return your fountain of youth. These bird's nest are the collection of the saliva of the swiftlets. And it is VERY expensive. Notwanting to be left out of a lucrative money making chance, I built my first Swiftlet hotel in my orchard.
 The bird house was ready last April . Normally we check on a new birdhouse when it is about 6 months old and then when it reaches 1 year old.
 To attract the swiftlets to the house so that they build their nest in the bird house, recorded bird music has to be played . Although we cannot understand the music, the bird house sifus can know the various type of music
I think we must be playing the correct music as the birds have actually started to build their nest near the speakers.

And after a nice meal with good music they shit in the house! Like a good Boy Scout I was taught a lot about the bird shit today. No bullshitting but the bird experts know a lot from the bird shits.

The fathera nd mother birds are in this nest. Normally the nest is harvested once the birds fly away. The next time we come we will be harvesting some nest.